NOTE: Some UI elements in the Dataset Management Experience have been updated since 12/7
The Data & Insights Data Management Experience aims to help you quickly validate, clean, and transform your data before loading it into a dataset which can be visualized and queried. Some of these transformations might include geocoding, reprojecting from state plane to WGS84, special date parsing, parsing text into another type, or more. The ingress experience allows you to run custom validations and transformations using a familiar SoQL grammar, but with functions geared towards transforming and validating, rather than querying and aggregating. You can view a list of available transforms here: https://dev.socrata.com/docs/transforms.
It turns out that in the ingress experience, all data type changes and geocoding is expressed as a SoQL data transformation. For example, when you choose to change a text column to a number using the type selection drop-down, that action generates a SoQL data transformation. Recently, we added functionality in the user interface to allow you to access and modify this underlying data transformation. This is what we’ll be walking through.
Adding and Transforming Data
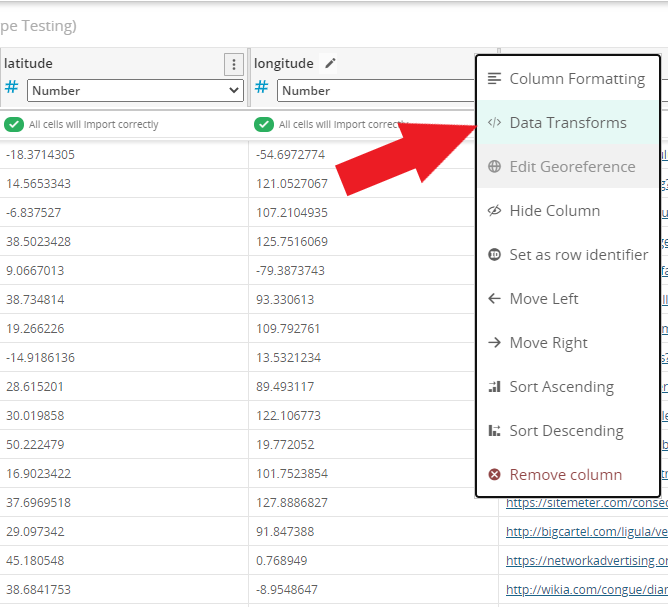
To get started, add a data file in the Data & Insights Data Management Experience by clicking the “Add Data” button. You can use a local upload of a data file or an external link. Next, find the column you want to transform or validate, and from the column options drop-down, select “Data Transforms”:
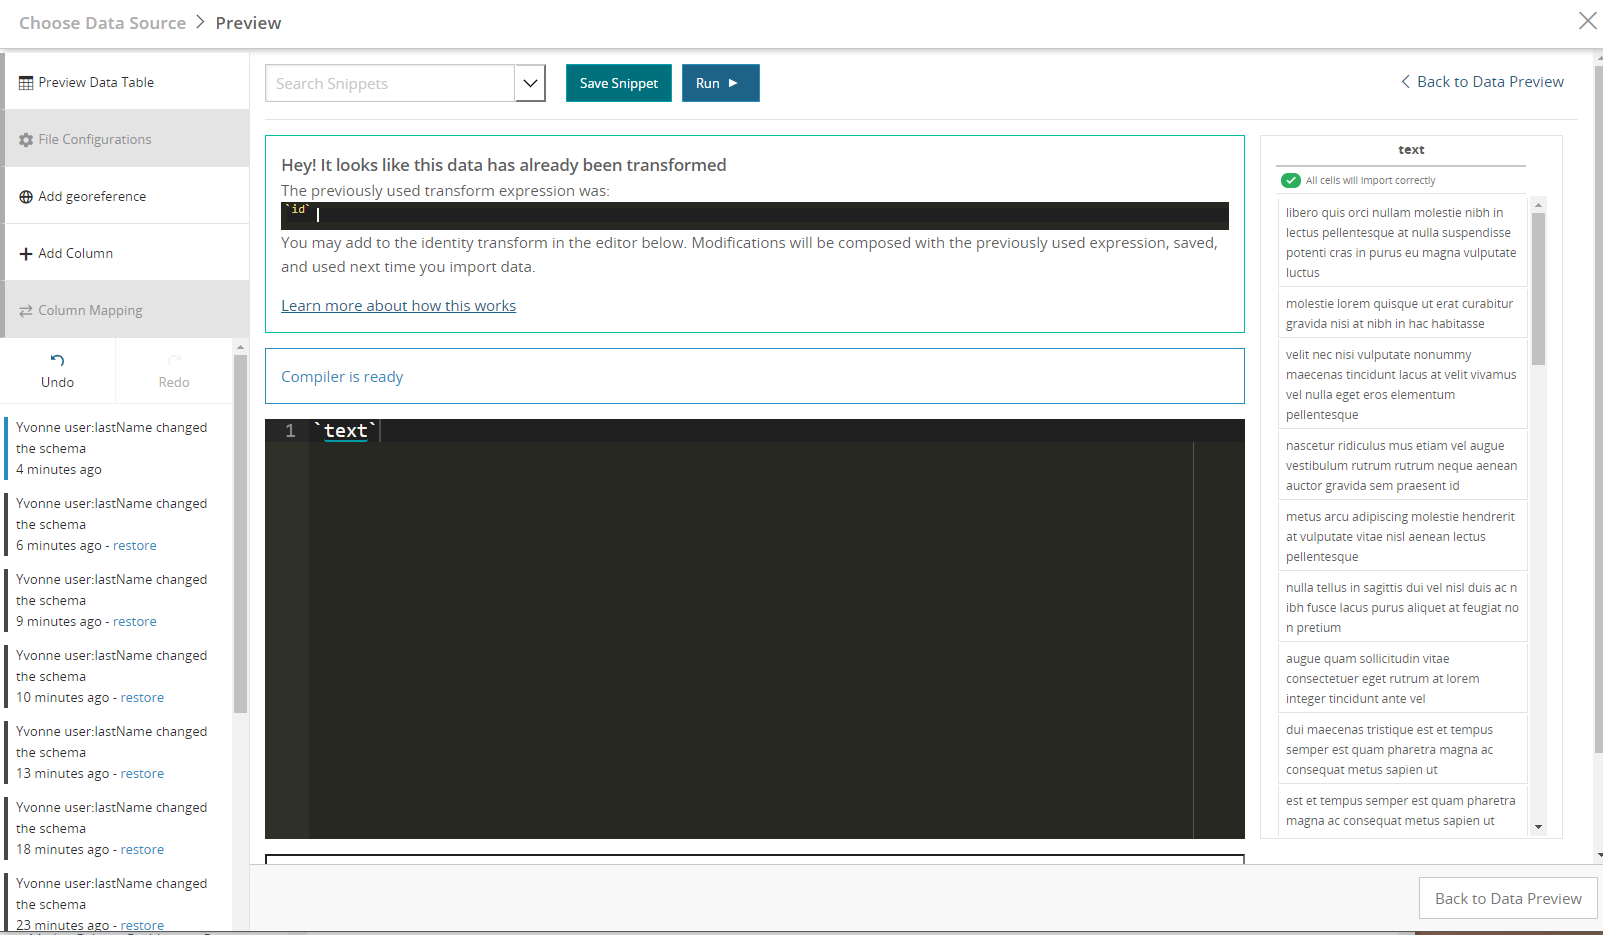
This will open the Data Transform editor. This editor is a code editor that accepts a SoQL expression. In the initial upload of the data file, the editor contains the current expression that is used to produce column data. By default, it will just be a reference to the column in your original CSV.
As you type, it will recompile your expression in the context of the current dataset, reporting any errors. Common errors might be simple typos such as unmatched parentheses or references to columns that don’t exist in your dataset. It will also catch type errors, such as trying to use the multiplication operator on two text strings.
The following image shows the compilation failure after typing a column name incorrectly. The red highlighted line in the editor shows which line the error occurred on and the red outlined box under the editor shows the reason.

The autocomplete function allows you to explore input columns or functions that you might want to use. If you start typing, the autocomplete window will show partial matches. As you hit the up and down arrows to select items, documentation for how to use that function will be shown in the blue outlined window at the bottom. You can also open the autocomplete window manually by hitting ctrl+space.
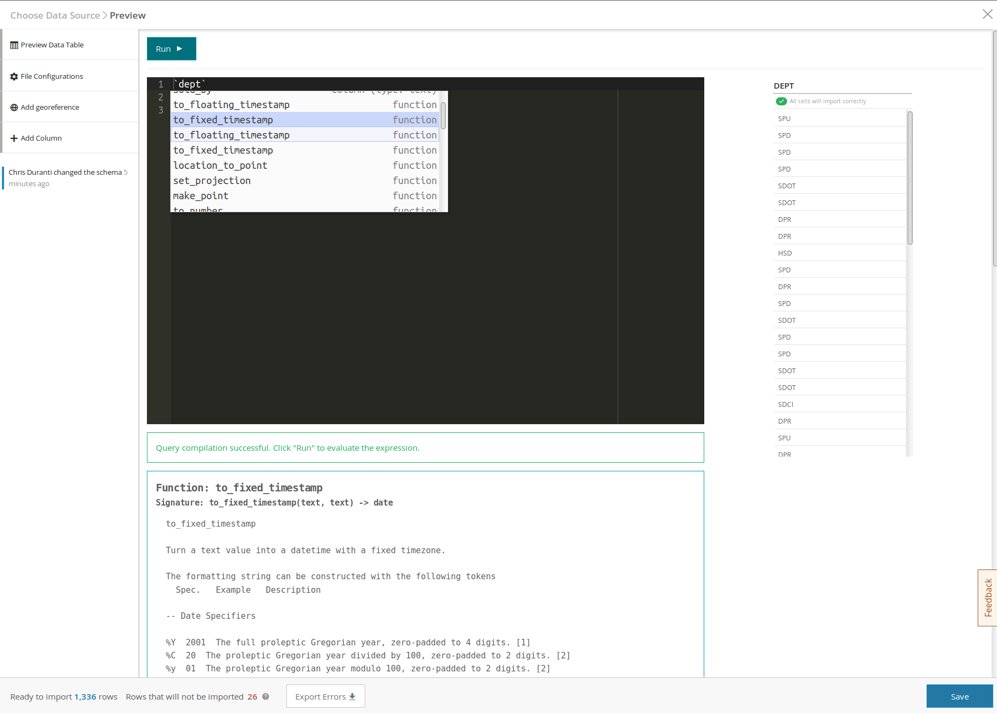
In the following picture, I used ctrl+space to bring up the autocomplete window and then hit the down arrow to explore functions. The to_fixed_timestamp function docs are shown, with a type signature and examples on how it can be used.
Other Possible Errors
Datatype Errors: If you add data and then change the datatype of a column, that datatype change will not be registered until the dataset is published. This can lead to the inability to apply the transform you want to a newly uploaded column. Therefore, it is always a best practice to explicitly define data types in the transform.
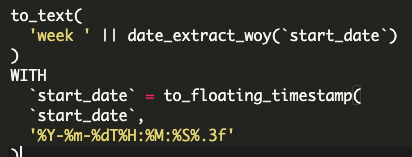
For example, in an "Extract Week of the Year" transform referring to a column labeled "start_date", the basic transform is: to_text( 'week "|| date_extract_woy('start_date')). But it should be written as: to_text( 'week "|| date_extract_woy(to_floating_timestamp('start_date'))).
Once Data & Insights publishes it, the transform in SoQL query form will look like:
Building an Expression and Validating Data
Now that we have an overview of what the major pieces are, let’s begin building an expression! We can see in the column to the right that we’re working on a column called `dept` with several different values. One thing we might want to do is to validate that our dataset will only have a certain set of values. Let’s pretend (for the sake of this example) that our city has the following departments:
'SPU', 'SPD', 'SDOT', 'DPR', 'HSD'
If there is another value here, such as ‘SPX’, we know that’s an invalid value in our source data. We want to write an expression to ensure that only that set of values appears. Furthermore, we’d really like to pluck all the rows containing invalid values out of our source file and send them back to the data owner so we can figure out what the issue is.
We can use the “case” function to accomplish this. Once we’ve written our expression in the editor, and the “Query compilation successful” message shows up, we can click the “Run” button to run our expression.
The following image shows what an expression to accomplish that might look like.
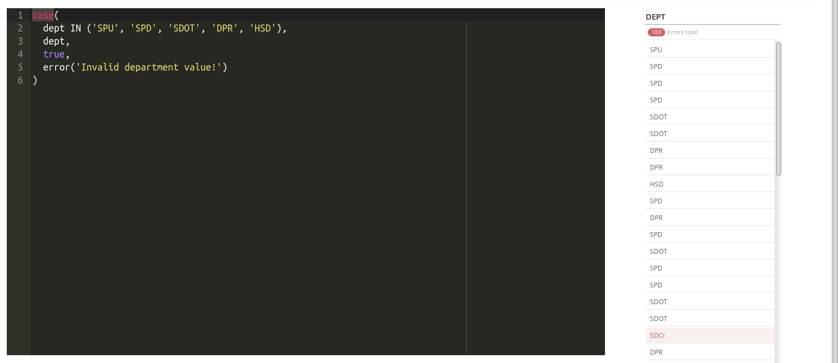
Hint: Highlight a token (word) in the expression editor to bring up documentation. In the above image, I’ve highlighted “case” token, and the “case” documentation has been displayed.
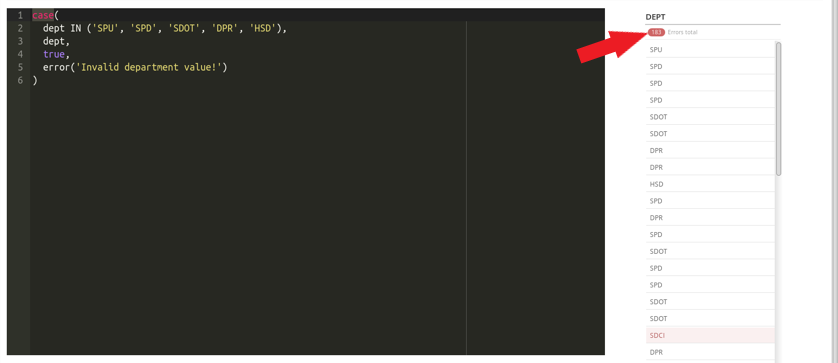
After the expression has run, we see a count of errors. It looks like this column has 183 invalid department values! We can filter this column down to the errors just as we would in the Data Table Preview view, by clicking on the red error count at the top of the column.
Once we click save at the bottom of the screen, we will be redirected to the full data table view. When we publish this dataset, any row with an error will be omitted from our published dataset.
We can use the “Export Errors” button at the bottom of the screen to download a CSV of all the rows which had errors, along with the reason for the error.
When you add more data to your dataset (either updating or replacing) through this user interface, or using a script generated by the “Automate This” button at the bottom of the screen (which interacts with the Data & Insights Data Management API), the data transformation you just created will be automatically applied to your incoming data.
Editing Complex Transformations
When editing complex transformations - particularly adding new conditions to Case transformations - be sure to update your data. This will prevent the new transform from being nested inside the existing transformation code. If you have a lot of data, simply uploading an append of just the column headers will be sufficient.
Embedded case statements end up looking like this. They can lead to incorrect data and ultimately to being unable to update your data.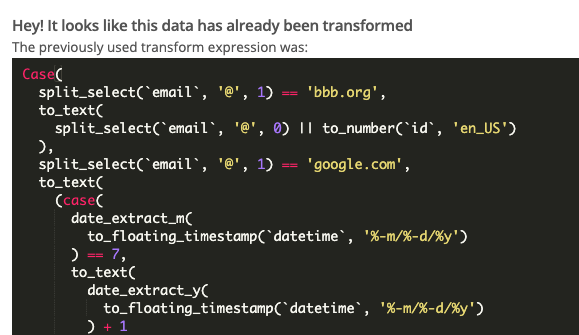
Note: It’s important to understand that if you use any method to update a dataset other than the Data & Insights Data Management Experience or the Data & Insights Data Management API—such as DataSync, the Data and Insights (still called Socrata) Writer in FME, or a library that interacts with the Data & Insights Publisher API—data transformations will not take place. Because it is an asynchronous, transactional process, you may want to use a separate API like the Data & Insights Publisher API if your changes to the data are frequent, well-formed, and don’t need to be transformed.
You can see other articles on specific transformations here:
- Data Transformations: Reprojecting from State plane to WGS84
- Data Transformations: Using an on-prem ESRI Geocode server to geocode a dataset
Happy publishing!
Comments
Article is closed for comments.